Saturday 5 December 2009

Completed Stamps


And im done! Here are the final designs for the stamps. They have all turned out so much better than i was expecting them to and I am extremely pleased with them all.

I was debating whether or not i should incude some kind of text on each of the stamps, as a lot of stamps do as indicated in my mood board research. However i felt that they didnt actually need to have any and where fine the way they are. Especially since the stamps i normally use have no text on, so i thought i would do the same!

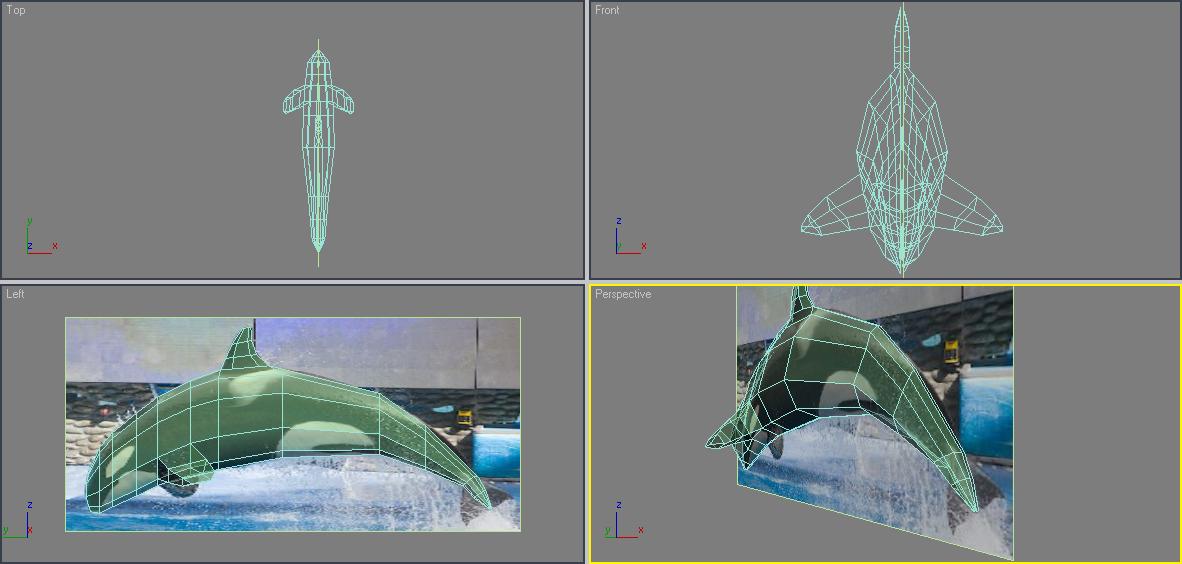
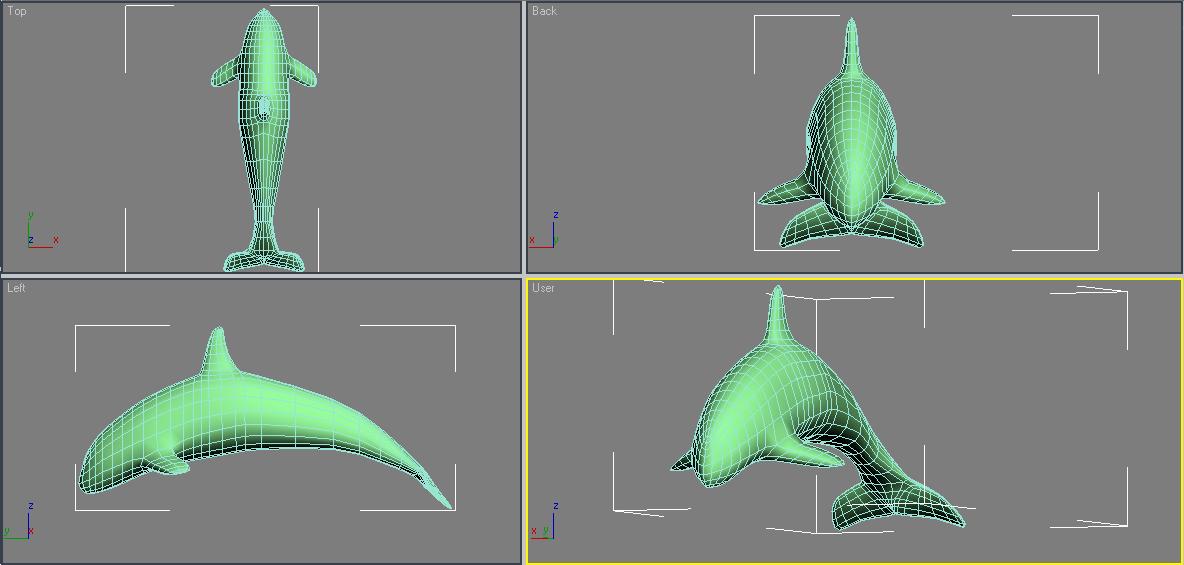
Anyway. I have really enjoyed using 3D Studio Max. I found it quite difficult to use at first but now i feel so much more confident with it. I will definately be continuing to use this program in the hope that someday i may be able to use these skills for some kind of ideal job for me. :D

Butterfly With Background


And here is my final stamp image. It has turned out a little different than i had originaly planned, but i think it is for the better. I found this great picture of a grassy field which i thought would be perfect for my butterfly model. I stuck one on and then realised that it would look so much more effective if i included several more butterflies in the background all in different positions. I think it has turned out great!

As it can be seen i didnt have much luck finding a better texture to use for the butterfly body. Finding a good texture to use on the Internet is very hard, and I had no idea how to go about creating the texture myself. So in the end i settled for this new one. I think it looks better than the one i used before, but i know it could probably still be better.

Friday 4 December 2009

Venus Flytrap With Background


Here is the completed Venus Flytrap image. At first i did think that it may be a little too crowded, but i messed around with the it a lot by deleting some models, rearanging and resizing them and i felt that this was actually fine as it was. I am quite pleased with how its turned out.

Also, i added some small hairs to the inside of the Flytrap's mouth. These are quite importamt features of the Venus Flytrap so i thought it would be best to include them, even if they are hard to make out!

I spent ages trying to find a suitable background of a type of swap area but i just couldnt seem to find one that worked. I was starting to consider creating a pot and placing a handful of the models in that. However i eventually found this image. Its an extreme close up of a long blade of grass. I wanted to stick to doing wild Venus Flytraps, so i thought that this background would be the next best thing.

Sunday 29 November 2009

Venus Flytrap


Here are the final Venus Flytrap models


First i uploaded a reference picture onto a plane. I then created a box and manipulated the vertices to get a basic outline of the head.


This was then turbosmoothed.


Next i extruded several polygons from the top outside of the head.


And then I modified the ends of them to give them more of a spike shape. I did try to just collapse all of the corners at the top of each extruded spike and it did work. However it shrunk the spikes by about half the size, so this method proved to be the better of the 2, despite it taking longer.


I then shrank the size of each one and turbosmoothed it once again.


Then i mirrored the completed side and rotated the 2 pieces a little to get the merge of the head at the bottom to become more seemless.


Next i created a cylinder which would act as the stem of the flytrap.


I then created another plane with a leaf teaxture applied to it and placed it above most of the stem.


Next i used the Soft Selection tool to give the stem a more jagged look to give it more realism.


Then the texture for the head was applied, and the model was placed upright.


Once i had completed the open mouthed Venus Flytrap model, i thought i'd do another one with a closed mouth. So I went back to an earlier save file and edited it a little.


I then repeated the stem process for the other flytrap model.

I am quite please with the outcome of these models. They have turned out better than I expected. And now to add a background to it...

Stamp Moodboard


It recently occured to me that I hadn't actually researched into stamps. So here is a moodboard!

Before i started actually looking at stamps, i was under the impression that most of them were boring and had a plain white background. However as it can be seen here, i was very wrong. I believe that these stamps would not be quite as eye-catching without backgrounds as they are right now, which is why I am happy to say that I will be adding backgrounds to my own stamps. I think that they are all very nicely done and they have inspired me to improve upon the designs for my stamps that i had originaly intended on using.

Monday 23 November 2009

Killer Whale With Background (complete)


Done! I eventually found a background that worked nicely. I think the line between the sea and sky is quite seemless which makes it look so much better. I also added another light effect underneath the whale to give it a bit more realism. Finally, I added a SuperSpray by the tail to create a splashing effect. I could probably make it look a little better by perhaps bluring the particles a little, but I am happy with the way its turned out. I may change it at some point though...
I am very happy with this. It has turned out exactly as i imagined. Now i really must make a start on my Venus FlyTrap!

Sunday 22 November 2009

Killer Whale With Background (Incomplete)

Ok, i couldnt resist! I was meant to wait until i'd finished my last model to start on the backgrounds, but i found a great tutorial on how to make the sea so i just had to give it a go.

Its not quite complete yet. Im finding it difficult to get a background image of the sky that doesnt stretch when i apply it. I also need to change it so that the merge between the sea and sky is more seemless. And finally, because of the way the lighting has been angled, the textured effect i have on the whale is not showing on the side facing the camera. Im sure this can easily be fixed, but i have no idea how. I'll have to get some help later! Oh yeah, and i need to add some splashing effects by the tail to make it look more realistic.

For anyone who is interested, here is the tutorial i used:

http://www.youtube.com/watch?v=tE44k7d_FtI

Friday 20 November 2009

Killer Whale Complete

Here is the complete final model of my Killer Whale.

First, i found a reference picture online and put in on a plane. I then created another plane and placed it infront of the refence. This plane was then shaped into the main body of the whale.

Next i extruded the plane to get it into the shape of a whale's body.

This is what it looks like when it is mirrored.

I then extruded the fins of the whale out. In order to do this I extruded it once, angled it a little then repeated it twice more.

I then extended the size of the fins a little.

I then did the same with the dorsal fin. I extended the plane and then extruded it.

Here i started to work on the tail fin thing. I extruded a small section of the end of the body.

In order to get the tail shape, i had to use the same method as the 2 fins and extrude it several times while angling it inbetween each extrusion. This took quite some time as highlighting the correct vertices and moving them into the correct position proved to be quite a challenge.

However i got there in the end!

The reference plane was the deleted. I then solidified the mirrored section so it became one full object.

A few adjustments were made to make it more Killer whale-like. For example, extending the size of the dorsal fin and tail.


Next, i had to add the texture. To do this I unwrapped the model by using UVW mapping. This seperated the whale model into several sections. I had to find out which bits connected to what and weld them together.

Then came the annoying task of having to draw the white bits of the whale myself onto the mapped model. As you may imagine, this took some time...

However, the work paid off! I then finally added a material effect to make it look more glossy and get a wet effect.
I am very pleased with the model. Hopefully if i finish my next model fast enough, i will be able to add a background to this one. :D

Sunday 8 November 2009

Killer Whale Progression


Using the above image as a refence, i have created this model of a killer whale. I will post the step by step process of how i created it in a later post once i have completed it.

SWOT Analysis

Strengths

I believe that my strengths so far have been understanding Richard's tutorials and using them to my advantage, as well as planning the final design for my stamps.

Weaknesses

My main weakness is lacking the confidence to create something without some sort of tutorial or reference's help. Whener i try to create something from scratch, even something as simple as an apple, i just cant remember/think how to do it.

Opportunities

I am really enjoying this software. So much infact that it has actually crossed my mind to specialise in 3D modeling and animating. I know that the more confident i become with this software, the closer it will bring me to reaching this goal.

Threats

As i previously mentioned, without some sort of guidance i normally dont know where to start. However i know that the more i use 3D Studio Max, the more confident i will become with it and hopefully it will become a second nature to me.

Friday 6 November 2009

Possible Final Designs

Here are some basic sketches of the final design of the stamps.


During the mood board stage of the project, i took a liking to the idea of somewhere including a rainforest in one of my stamps. So i thought it would be nice to have one in the background of the butterfly stamp.

However creating such a large background, as well as the model itself, may prove to be a bit ambitious as there is only a limited amount of time to get these done. So if i do manage to include a background in the final design, i will make the butterfly much larger to make it the focus of the stamp and only have a handful of trees instead.


I pictured the Venus Fly Trap to be surrounded by other plants and grass with the sun in the background. Upon reflection, i suppose a rain forest background would have suited this subject better as it is more tropical than a butterfly.
Finally, i want to do a killer whale jumping out of the sea. I believe that it wont be as difficult to create the sea as a background rather than millions of trees. So hopefully the final outcome will turn out closely to the sketch.

Sunday 1 November 2009

Chosen Biodiversity Subject Moodboards


Here are a couple of moodboards for each of my chosen subjects. Hopefully these will give me some inspiration when creating my models.

Sunday 25 October 2009

Butterfly


Here is one of my chosen Biodiversity subjects. (Which reminds me...i must upload my individual subject mood boards later on....). I chose a butterfly as i thought it would be a relatively simple choice for my first attempt. Also because i like the endless patterns that you could find on their wings. I am aware that the body colour scheme probably isnt the best, but i couldnt find a good picture of a butterflies body anywhere, so i got the next best thing...a cocoon.


First, i found an image of a butterfly wing on the internet. (You have NO idea how long it took to find one that i could actually use). Then using the same method for the leaf in Richard's materials tutorial, i added the wing onto a plane.

Next, i started on the body by creating a cone.

I then elongated the cone a little.

Next i coned the top half in order to make it resemble a butterflies body a little more. I also reduced the size a little.

Next i alligned the body with the wing and also added an antenna by using the same method as the body.

I then mirrored both the wing and the antenna in order to get an exact duplicated reflection.

Next i angled the antennas a little, as well as add small balls onto the end of them to make them look a little more realistic.

And finally i added the cocoon material to the body and antennas. As soon as i find a better reference, i will change the material. But for now, it will do.
For the final image i plan on having the butterfly surrounded by trees with the sky directly behind it. Its kind of hard for me to explain exactly how i picture the final image, so i will probably add a few sketches later.